
Complete guide to PrestaShop e-shop
Connecting PrestaShop with Google Ads, GA4, Merchant Center and Performance Max
Connecting a PrestaShop to Google properly is not just about placing a tracking code. It requires a full ecommerce data layer, Google Tag Manager, GA4, Consent Mode V2, an updated product feed, and reliable purchase tracking. In this guide, we walk you through the entire process, from installation to creating a Performance Max campaign.
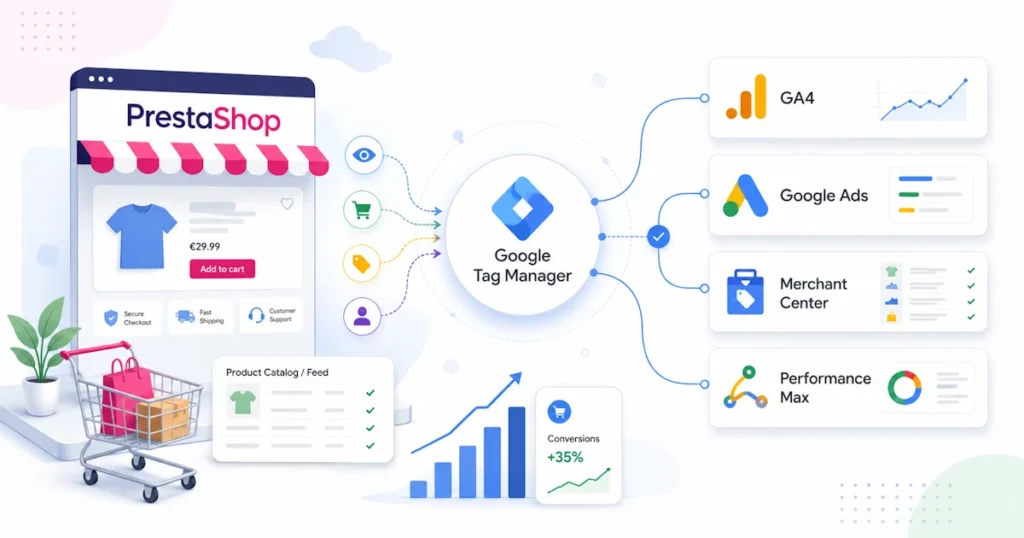
Many online stores think they have completed the Google Ads connection because they have installed a Google tag or because they see visits in Google Analytics. In practice, this is not enough for an efficient ecommerce campaign.
For Google to optimize a Performance Max campaign, it needs to receive clean and consistent data for the entire shopping journey: product views, adds to cart, checkout initiation, shipping and payment selection, completed purchases, order value, and products purchased.
Let GA4 and Google Ads know not only that a visit took place, but also which product the user viewed, what they added to the cart, what value the purchase had, and which advertising action led to the conversion.
The architecture of an integrated connection
The connection is not done by a single tool. Each platform has a different role and they all need to work together with the same data logic.
PrestaShop
It is the source of real data: products, prices, stock, cart, customer, checkout and order.
GTM Full Data Layers
Converts user actions into structured ecommerce events and promotes them to the dataLayer.
Google Tag Manager
It receives events and triggers the appropriate tags for GA4, Google Ads or other services.
Consent Mode V2
It transfers the visitor's consent choice to Google tags and adjusts their behavior.
Merchant Center
Maintains the structured list of products that can be used in Shopping and Performance Max.
Performance Max
It uses conversions, conversion values, products, creatives, and audience signals to optimize the campaign.
1Create Google Analytics 4
We start with a Google Analytics 4 property and a Web Data Stream for the online store domain.
- We connect to Google Analytics.
- We choose Administrator → Create → Ownership.
- We define a business name, time zone and currency.
- We create a Web Data Stream for the PrestaShop domain.
- Copy the Measurement ID of the format
G-XXXXXXXXXX.
| ID format | Service | Usage example |
|---|---|---|
G-XXXXXXXXXX | Google Analytics 4 | Google Tag and GA4 event tags |
GTM-XXXXXXX | Google Tag Manager | Container snippets in PrestaShop |
AW-XXXXXXXXXX | Google Ads | Conversions, remarketing and Google tags |
The GTM- is not a GA4 Measurement ID and should not be loaded via
gtag/js?id=GTM-.... GTM needs the official container snippet.
2Create a Google Tag Manager container
Google Tag Manager acts as a central point for tag management. Instead of placing code for each service within the theme, we install the GTM container once and manage the tags from within its environment.
- We create an account in Google Tag Manager.
- We create a new container with a platform Web.
- We give the e-shop domain as the name.
- Copy the Container ID
GTM-XXXXXXX.
The correct installation code
The first section is placed high on the <head>:
<script>
(function(w,d,s,l,i){
  w[l]=w[l]||[];
  w[l].push({'gtm.start':new Date().getTime(),event:'gtm.js'});
  var f=d.getElementsByTagName(s)[0],
      j=d.createElement(s),
      dl=l!='dataLayer'?'&l='+l:'';
  j.async=true;
  j.src='https://www.googletagmanager.com/gtm.js?id='+i+dl;
  f.parentNode.insertBefore(j,f);
})(window,document,'script','dataLayer','GTM-XXXXXXX');
</script>
The second part is placed immediately after opening it. <body>:
In Netcraft's solution, the snippet can be imported from the module itself to avoid changes to the core or theme and keep the installation easier to maintain.
Check that the same GTM- ID is not loaded simultaneously by the theme, another module, and custom code. Double loading can create duplicate events.
3Installing GTM Full Data Layers for PrestaShop
The GTM Full Data Layers is the plugin we developed to generate complete ecommerce data layers from the real actions of PrestaShop. It is not limited to simple page views. It tracks the path from category and product to cart, checkout and order completion.
The path to the Back Office is:
Modules → Module Manager → GTM Full Data Layers → ConfigureBasic module setup
In the customized version of Netcraft, in the ID field we enter the Container ID:
GTM-XXXXXXX
The GA4 Measurement ID G-XXXXXXXXXX It does not need to be used as a second snippet within PrestaShop. It is added to the Google Tag that we will create within Google Tag Manager.
Older or unconfigured versions may display "Google Analytics ID". The actual value to use depends on how the module works. In this particular GTM implementation we use
GTM-XXXXXXX.
Enabling ecommerce events
The module allows us to individually enable or disable the following events:
purchasebegin_checkoutview_itemview_item_listview_cartadd_to_cartselect_itemremove_from_cartadd_shipping_infoadd_payment_info
For full ecommerce tracking, we recommend that all be enabled, unless there is a specific technical or commercial reason to exclude one.
Debug Mode
The choice Debug Mode Enables logs that help with technical auditing of controllers, hooks, and events. It is useful during installation or when an event does not appear, but in normal production mode it is recommended to remain disabled.
The ecommerce events that PrestaShop should send
Events are the language of communication between PrestaShop and the Google ecosystem. Each event conveys a different stage of the funnel and must include consistent product details.
view_item_list
Executed when a product list is displayed, such as category, search, manufacturer page, new or recommended products.
select_item
Executed when the visitor selects a product from the list. Allows measurement of click-through rate per product and position.
view_item
Records the product page view, along with ID, name, category, brand, price, variant, and currency.
add_to_cart
It records the addition to the cart. It is one of the most important intermediate signals before the purchase.
remove_from_cart
It records product removal and helps identify products that are frequently abandoned before checkout.
view_cart
It separates those who simply added a product from those who actually opened the cart and reviewed the order.
begin_checkout
It is triggered when the ordering process begins and is a key point of measurement for checkout abandonment.
add_shipping_info
Records the shipping option and may include the
shipping_tier.
add_payment_info
Records the payment option and may include the
payment_type.
purchase
It is executed after a successful order and includes transaction ID, value, currency, tax, shipping and the array of products.
Example view_item
dataLayer.push({
  event: "view_item",
  ecommerce: {
    currency: "EUR",
    value: 99.90,
    items: [{
      item_id: "123",
      item_name: "Όνομα προϊόντος",
      item_brand: "Brand",
      item_category: "Κατηγορία",
      price: 99.90,
      quantity: 1
    }]
  }
});
Example purchase
dataLayer.push({
  event: "purchase",
  ecommerce: {
    transaction_id: "ORDER_REFERENCE",
    affiliation: "Όνομα καταστήματος",
    value: 99.90,
    tax: 19.33,
    shipping: 4.00,
    currency: "EUR",
    items: [{
      item_id: "123",
      item_name: "Όνομα προϊόντος",
      item_brand: "Brand",
      item_category: "Κατηγορία",
      item_variant: "",
      price: 95.90,
      quantity: 1
    }]
  }
});
The most important fields of purchase
| Field | Role |
|---|---|
transaction_id | Unique order identifier to avoid duplicate entries. |
value | The value that will be used in conversion value reporting and optimization. |
currency | Currency in ISO 4217 format, e.g. EUR. |
shipping | The shipping cost of the order. |
tax | The tax value that is decided to be sent according to the reporting logic. |
items | The products, quantities, prices, brands and market categories. |
The logic of value, tax, shipping and product prices must be consistent throughout the facility and agree with the reporting method that the business or marketing agency will use.
5Check with Tag Assistant before Publish
We don't publish an installation because it "looks right." The entire purchase flow must be checked through Google Tag Manager Preview.
- We are pressing. Preview in GTM.
- We connect the PrestaShop domain.
- We are opening a product category.
- We choose a product.
- We add it to the cart.
- We open the cart and start checkout.
- We choose shipping and payment.
- We are completing a test order.
Tag Assistant should display, depending on the flow:
view_item_list select_item view_item add_to_cart view_cart begin_checkout add_shipping_info add_payment_info purchaseAt every ecommerce event the tag GA4 – All Ecommerce Events it should appear as successful.
Purchase control
At the event purchase we open the tab Data level
and we confirm that there are:
ecommerce.transaction_idecommerce.valueecommerce.currencyecommerce.taxecommerce.shippingecommerce.items
Inside items we check at least item_id,
item_name, price and quantity.
A GA4 Event tag may show as "Successful", but the ecommerce object may be empty or contain incorrect values. The actual data should be checked.
6Consent Mode V2 and cookie banner in PrestaShop
Ecommerce tracking must work with visitor consent choices. Google Consent Mode V2 uses four key consent parameters for analytics and advertising:
analytics_storage ad_storage ad_user_data ad_personalizationDefault state before selection
gtag("consent", "default", { ad_storage: "denied", analytics_storage: "denied", ad_user_data: "denied", ad_personalization: "denied", functionality_storage: "granted", personalization_storage: "denied", security_storage: "granted" });The default must be executed before Google tags that depend on consent.
Update after acceptance
gtag("consent", "update", { ad_storage: "granted", analytics_storage: "granted", ad_user_data: "granted", ad_personalization: "granted", functionality_storage: "granted", personalization_storage: "granted", security_storage: "granted" });Which additive can be used?;
An indicative selection from the official PrestaShop Marketplace is GDPR Compliance Pro + Google Consent Mode V2 .
However, purchasing a consent module does not prove that the installation is working properly. The popup must appear in all languages, the choices must be saved, and the module must send an actual consent update to GTM.
- Support
ad_storageandanalytics_storage. - Support
ad_user_dataandad_personalization. - Default consent before loading tags.
- Consent update after Accept, Reject or change of preferences.
- Operation in all languages and on mobile.
- Possibility of withdrawing consent.
- Compatibility with themes, checkout and custom scripts.
Consent check in Tag Assistant
- We open a new Preview without saved prior consent.
- Before clicking on the banner, we check that the advertising and analytics categories are denied.
- We are pressing. Accept all.
- We make sure it appears Consent Update or similar event.
- In the Consent tab, we check that the allowed categories have been granted.
- We repeat the test with Rejection.
The Consent Mode technical implementation does not in itself constitute legal advice. The cookie policy and overall compliance should be assessed by an appropriate legal or data protection advisor.
7Create and set up Google Merchant Center
To use PrestaShop products in Shopping and retail Performance Max, you need a Google Merchant Center account and a reliable product data source.
During the initial setup we fill in:
- company name and details,
- e-shop domain,
- verification and claim of the website,
- country and language of sale,
- shipping policy,
- returns policy,
- contact details.
Merchant Center must correctly receive attributes such as:
id title description link image_link availability price sale_price brand gtin mpn condition google_product_categoryThe quality and consistency of this data affects product approval, search matching, and campaign quality.
8Sending products with XML/CSV feed
For automated catalog sending we use the new Netcraft plugin:
PrestaShop XML/CSV Feed for Google Merchant Center
The module creates automated feeds for Google Merchant Center, Google Shopping, Performance Max and Local Inventory, with product selection, multilingual files, category mapping and cron updates.
Why shouldn't we always send the whole list?;
A large PrestaShop may include out-of-stock products, very low margin products, old codes, or categories that we don't want to advertise. The category selection feature acts as a quality gate before the products reach Merchant Center.
Advertised Products Feed
It creates a specialized XML or CSV feed for the categories we want to advertise, with automatic inclusion of subcategories.
All Products Feed
Creates a complete feed of the entire catalog for general use, remarketing or other synchronizations.
Local Inventory Feed
Provides a separate feed for Local Inventory with actual availability from PrestaShop stock.
Multilingual feeds
The module creates separate feeds and cron URLs per active language. This way, titles, descriptions, and landing page URLs match the targeted country and language.
Greek feed → /el/ English feed → /en/ German feed → /de/GTIN, MPN and Brand
EAN/GTIN, MPN/reference, manufacturer/brand and correct calculation are supported identifier_exists. The quality of identifiers is particularly important for the correct identification of products.
Regular price and discount price
The feed separates price and sale_price. The sale price should only be sent when there is a real discount and the feed price should match the landing page.
Google Product Categories
Mapping PrestaShop categories to Google numeric IDs helps with correct classification and is independent of the feed language.
Automatic update with cron
Prices, discounts and stock are constantly changing. For this reason, the feed should be automatically updated and not created once.
0 5 * * * curl -s "SECURE_FEED_CRON_URL" > /dev/nullIn active e-shops, we recommend daily updates and more frequent execution when stock or prices change multiple times a day.
Submitting the feed to Merchant Center
- We go to the product data sources.
- We add a new source.
- We select scheduled download or the appropriate URL method.
- We define the country, language and URL of the XML/CSV.
- We define the frequency and recovery time.
- After processing we check for errors and warnings.
Common Merchant Center issues
- price discrepancy between feed and page,
- availability discrepancy,
- invalid or blocked image URL,
- incomplete GTIN or brand,
- wrong language landing page,
- product without shipping policy,
- policy violation or incomplete description.
9Connecting Google Ads and creating Performance Max
Connecting Merchant Center to Google Ads
In Merchant Center, we link the correct Google Ads account and accept the request. We carefully check the Customer ID, especially when there are multiple accounts or agency manager accounts.
Connecting GA4 to Google Ads
From GA4 we create a Google Ads product link. Then, in Google Ads we check the conversions and decide which purchase conversion will be used as the primary goal for bidding.
Do not simultaneously set two different sources that record the same purchase as primary, for example an imported GA4 purchase and a second Google Ads purchase tag, without a specific deduplication strategy.
Create a campaign
Google Ads → Campaigns → New campaign → Goal: Sales → Performance MaxThen we choose:
- the Merchant Center account,
- the country of sale,
- conversion goals,
- the daily budget,
- the bidding strategy,
- the listing groups,
- asset groups and audience signals.
Bidding strategy
Common choices are Maximize conversion value and, when there is enough reliable history, using target ROAS.
We don't arbitrarily choose a high ROAS target on a new installation. The decision should take into account:
- profit margin,
- average order value,
- conversion rate,
- customer acquisition cost,
- available budget,
- seasonality and past data.
Asset Groups and Listing Groups
Products and creatives should be organized into logical groups. For example:
Asset Group 1: Automatic coffee machines Asset Group 2: Professional machines Asset Group 3: Coffee grinders Asset Group 4: Coffee beans Asset Group 5: Spare parts and accessoriesEach asset group needs related text, images, logos, videos, and listing groups. Grouping helps messages match the products being displayed.
Audience Signals
Site visitors, cart adders, past customers, customer lists, and custom segments can be used. Signals act as a starting point and do not replace conversion and feed quality.
10Conversions, conversion value and avoiding double counting
Performance Max doesn’t just optimize for clicks. It needs a clear conversion goal and reliable financial value for each purchase. If conversions are incorrect, duplicated, or missing, the campaign will receive incorrect signals and may allocate budget to visits that don’t generate actual sales.
GA4 purchase or native Google Ads conversion?;
There are two common ways to get the purchase through Google Ads:
-
Enter the event
purchasefrom GA4 to Google Ads conversion. - Create a separate native Google Ads Conversion Tracking tag in GTM.
Both methods can work. What you shouldn't do without planning is to record both as primary conversions for the exact same purchase. In this case, Google Ads may consider one order as two conversions.
A clean approach is to use GA4 purchase as the primary conversion, provided the transaction ID, value, and currency have been properly verified. A native Google Ads conversion can remain secondary for comparison or troubleshooting, without affecting bidding.
Primary and secondary conversions
Primary conversions are used for bidding and appear in the main Conversions column. Secondary conversions are used more for tracking and comparison. For an ecommerce store, the real purchase should usually be the main goal.
Intermediate actions such as add_to_cart, begin_checkout or click-to-call can be tracked, but should not be treated as having the same value as a complete purchase unless there is a specific business reason.
Why is the transaction ID necessary?;
The transaction_id allows platforms to recognize the same purchase. It must come from the actual PrestaShop order and be unique. We do not use a fixed price, reusable cart ID, or random JavaScript timestamp instead of the order number or reference.
Checking the order value
Before launching the campaign, we compare at least ten test or real orders between:
- PrestaShop Back Office,
- GA4 DebugView or Realtime,
- Google Ads conversions,
- actual payment amount,
- product value, discounts, VAT and shipping.
The goal is not to necessarily match all columns on each platform with the same accounting definition, but to know exactly what is being sent and to keep the logic consistent. If the way the value is calculated changes later, we record the date of the change so that we don't compare disparate periods.
Conversion Linker
When using Google Ads conversion tags in GTM, we keep the Conversion Linker tag active on all pages. The tag helps store the click information needed to attribute conversions to ads.
11Product feed strategy, custom labels and budget allocation
A technically valid feed is not necessarily a commercially correct feed. Performance Max may spend a large portion of the budget on products that generate clicks but have a low profit margin, low availability, or low probability of sale.
Division of products by commercial value
Before creating listing groups, we classify products by criteria such as:
- gross profit margin,
- average product price,
- availability and delivery time,
- historical sales,
- refund or cancellation rate,
- seasonality,
- strategic importance of brand or category.
It is not always appropriate for products with different economic behavior to participate in the same campaign and the same ROAS target.
Use of custom labels
Merchant Center custom labels can be used for internal classification. They are not visible to the customer, but are very useful for listing groups and reporting.
| Custom label | Price example | Use |
|---|---|---|
custom_label_0 | high_margin / low_margin | Separation based on profit margin. |
custom_label_1 | bestseller / standard | Emphasis on products with proven sales. |
custom_label_2 | season_summer / season_winter | Seasonal campaign activation. |
custom_label_3 | price_0_50 / price_50_150 | Separation by price range. |
custom_label_4 | clearance / new_arrival | Separate strategy for clearance or new arrivals. |
Product titles
The feed title should be understandable and describe the actual product, without excessive keyword stuffing. Usually a combination of:
Brand + Product Type + Model + Main FeatureThe correct order depends on the industry. In books, the title and author may come first, while in electrical appliances, the brand and model may be more important.
Product images
The main image should be clean, without watermarks, placeholders, or unnecessary advertising elements. We check that Googlebot and Merchant Center can access the image URLs and that CDN, firewall, or anti-bot rules are not blocking them.
Stock and made-to-order products
The feed availability must follow the actual commercial policy of the e-shop. A product with zero physical stock can remain available if PrestaShop allows orders and there is a reliable lead time. However, we do not ship in_stock
for products that are essentially undeliverable.
12What we monitor in the first 30 days of a Performance Max
Publishing the campaign is not the end of the process. The first few weeks are used to confirm that the data, products, and budget are moving in the right direction.
First 48 hours: technical check
- We confirm that the campaign is eligible and has no policy errors.
- We check that the products appear in the listing groups.
- We check that conversion actions record purchases.
- We compare conversion values with PrestaShop orders.
- We check rejected or limited products in Merchant Center.
First week: movement quality
We don't evaluate the campaign just by the number of clicks. We monitor:
- cost, conversions and conversion value,
- add-to-cart and begin-checkout rate,
- categories and products that absorb budget,
- average order value,
- difference between mobile and desktop,
- new and returning customers where data is available.
Second to fourth week: commercial interventions
Once enough data has been collected, we can:
- exclude products with poor economic performance,
- create a separate campaign for high-margin products,
- improve titles and images in the feed,
- add better creatives to asset groups,
- review budget and target ROAS,
- fix landing pages with low conversion rates.
Key indicators that should be read together
| Indicator | What does it show? | What we should not ignore |
|---|---|---|
| ROAS | Revenue in relation to advertising costs. | He does not calculate the actual profit margin on his own. |
| CPA | Average cost per conversion. | Orders of different values do not always have the same meaning. |
| Conversion value | Value of purchases attributed to the campaign. | The technical delivery of the value must have been checked. |
| Conversion rate | Percentage of visits or clicks that lead to a purchase. | It is influenced by prices, stock, checkout and landing page quality. |
| Average order value | Average order value. | It may change by category, device and period. |
When is Performance Max not yet ready?;
We do not recommend starting a campaign when:
- purchase tracking has not been tested,
- most Merchant Center registrations are rejected,
- the feed stock does not match the store,
- the main pages have technical problems or load very slowly,
- there is no clear commercial goal or available budget,
- the business cannot meet the demand that may arise.
Advertising can bring in more qualified visitors. But it can't fix unclear prices, poor checkout, non-existent stock, non-competitive shipping, or incorrect product pages. Technical and commercial preparation comes first.
The most common errors in connecting PrestaShop to Google Ads
Page views only
The site records visits but not products, cart, checkout and purchase.
Incorrect use of GTM ID
The GTM- used as G- inside gtag.js.
GTM double loading
The same container is loaded by theme, module and custom code.
Two active Google Tags
Two tags with the same GA4 ID create duplicate shipments.
Purchase without transaction ID
The market does not have a unique identifier and is at risk of being double-listed.
Purchase on refresh
Refreshing the confirmation page creates a new purchase.
Cookie banner without update
The popup appears, but does not send Consent Mode V2 update.
Incomplete Consent Mode V2
Missing ad_user_data and ad_personalization.
Custom HTML without consent
Facebook Pixel, Clarity or other scripts are executed regardless of the options.
Wrong feed
Prices, stock, URLs and images do not match the live store.
All products together
Products with different margins and targets are introduced without segmentation.
PMax before control
The campaign starts before conversions and Merchant Center approvals are confirmed.
Final checklist before Publish and the start of the campaign
- The GTM container loads once.
- Google Tag uses the correct
G-ID. - There is no second active GA4 Google Tag.
- The
view_item_listappears in product lists. - The
select_itemappears on product click. - The
view_itemappears on the product page. - The
add_to_cartandremove_from_cartthey work. - The
view_cartandbegin_checkoutthey work. - The
add_shipping_infoandadd_payment_infooperate where supported. - The
purchaseappears only after a successful order. - The purchase has a unique
transaction_id. - The purchase has
value,currencyanditems. - The default consent is denied before selection.
- Accept creates Consent Update.
- Reject keeps unnecessary denied categories.
- The Merchant Center feed is updated automatically.
- The prices and stock of the feed agree with the site.
- Most products are approved in Merchant Center.
- Merchant Center and Google Ads are connected.
- The correct primary purchase conversion goal has been set.
- Listing groups and asset groups follow the commercial strategy.
Do you want to properly connect PrestaShop with Google Ads and Performance Max?;
Netcraft can take care of the entire process: GTM installation, full GA4 ecommerce tracking, Consent Mode V2, Merchant Center feed, product review, conversions connection and Performance Max campaign creation.
The right technical foundation allows Google to optimize with real sales data and not with incomplete page views.
Phone: 215 540 3231
E-mail: sales@netcraft.gr
Frequently asked questions
Can I connect PrestaShop directly to Google Ads?;
A Google Ads tag can be installed directly, but for complete ecommerce tracking and easier debugging, Google Tag Manager with a full data layer is recommended.
Is Merchant Center necessary for Performance Max?;
For retail Performance Max that promotes products, Merchant Center provides the catalog, prices, images, and availability that the campaign uses.
What is dataLayer in PrestaShop?;
It is a JavaScript mechanism through which PrestaShop transfers structured information about products, cart, checkout and orders to GTM.
What ecommerce events does a PrestaShop need?;
The basics are view_item_list, select_item,
view_item, add_to_cart, remove_from_cart,
view_cart, begin_checkout, add_shipping_info,
add_payment_info and purchase.
Is it enough to install a cookie banner?;
No. It must be confirmed that prior to consent the appropriate categories are denied and that after the user's selection a correct consent update is made.
How often should the product feed be updated?;
It depends on the frequency of price and stock changes. For an active e-shop, at least daily updates are recommended, and more often when stock changes rapidly.
Should I use both GA4 purchase and Google Ads purchase?;
You can use them for comparison, but they should not both be primary conversions for the same market without a clear strategy, because there is a risk of double counting.
Do I need to advertise all PrestaShop products?;
No. It is often more efficient to start with selected categories, best sellers, products with a satisfactory margin and reliable stock.
When should I set a target ROAS?;
When there is sufficient and reliable historical conversion value. A too strict goal from day one can significantly limit visibility and data collection.
Can Netcraft take care of all the interconnection?;
Yes. We can handle GTM, GA4 ecommerce, Consent Mode V2, Merchant Center, product feed, conversions and Performance Max campaign creation.
